 Twitter
 Email
Email RSS
RSSEnergy Tip: Reapply Mastic on HVAC Seals
This past week, my family was headed out of the house for a brief vacation and I took the opportunity to reseal the joints in my HVAC system. I had long read that resealing HVAC joints would cut down energy costs. After resealing our HVAC joints I have to say this is probably one of the most significant and least well know energy savings tips I have found for reducing your home energy costs.
Mastic Duct Sealant
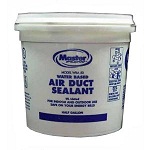 Mastic is like a wet caulk that you apply with a paint brush to joints in your HVAC to seal them and ensure that conditional air is not escaping into unconditioned spaces - as that is equivalent to throwing money out the window. I recommend picking up a half gallon tub of mastic ( I found at Home Depot for ~$12) which was more than I needed to cover my whole HVAC system.
Usually when I hear of HVAC work I immediately think to call my HVAC technician, but this job is easy enough to do yourself. If you can operate a paint brush and don't mind crawling in your crawlspace or attic you can reseal your HVAC joints.
Step 1: Check your HVAC system for existing seals with mastic. More than likely you have HVAC seals throughout your system especially where the boxes connect to non box ductwork. Areas that have existing mastic are prime areas for further improvement. My house/ductwork is 20years old and my first visual inspection led me to believe there was nothing to do. However after spending some time and looking for small air leaks I began to find a bunch.
Step 2: Looks for air leaks. You can check both the existing mastic seals and other areas (I found some corners of my existing ductwork had airleaks where there was no mastic). One tip I read was to take a single ply piece of toilet paper (the lightest you can find) and lay over your dustwork while the system was running. If you see the toilet paper rise or flutter that's a good indication of an air leak. Bigger air leaks are easy to detect just by running your hand slowly over the ductwork. I found leaks were easiest to detect with the biggest temperatures differentials (ie run cold AC on the hottest day).
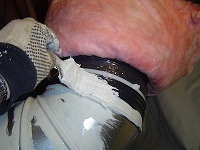
Step 3: Apply mastic. Its a little messy so wear old clothes, but anywhere your concerned about a possible air leak, spread some mastic with a paint brush over the area. The directions indicate the mastic should be about a nickel width in thickness to provide a good seal.
Step 4: Let mastic dry. - Direction instruct to let the mastic dry a couple days before using your HVAC again to allow it to seal properly. I applied the mastic right before we let for a couple days so I could leave the system off while we traveled.
Given that your HVAC ductwork is carrying conditioned air, sealing holes in your ductwork can leading to immediate energy savings. I have noticed that the HVAC system seems to be running a little less now and am hoping to notice a small drop in our energy bills going forward.
Here is a list of other energy improvements we've done as well.
by 2million on
08/07/12
![]() |
Tweet
| Add to del.icio.us
| Comments (0)
|
Tweet
| Add to del.icio.us
| Comments (0)
Related in Energy Savings:
Water Heater Timer Project (Jan 19, 2014) I installed a timer on our electric water heater as my weekend project: Material Cost GE 15207 Hot Water Heater Timer $40.96 3/8" Clamp Connectors $1.65 10/2 wire (3 ft) $3.48 Total: $46.09 A couple years ago I participated in...
Reduce Home Energy Costs (Jan 23, 2012) Regulars readers know over the past couple years I've had some focus on trying to reduce our household energy costs. We moved into our current home at the end of 2008 and it didn't take long for me to realize...
Adding Insulation to Our Attic (Oct 12, 2011) I received a $10 off $50 coupon at Lowes Home Improvement with my Discover Card in the mail this week. These are a great excuse to start a home improvement project and I can see why Lowes finds it...

Comments (0)